
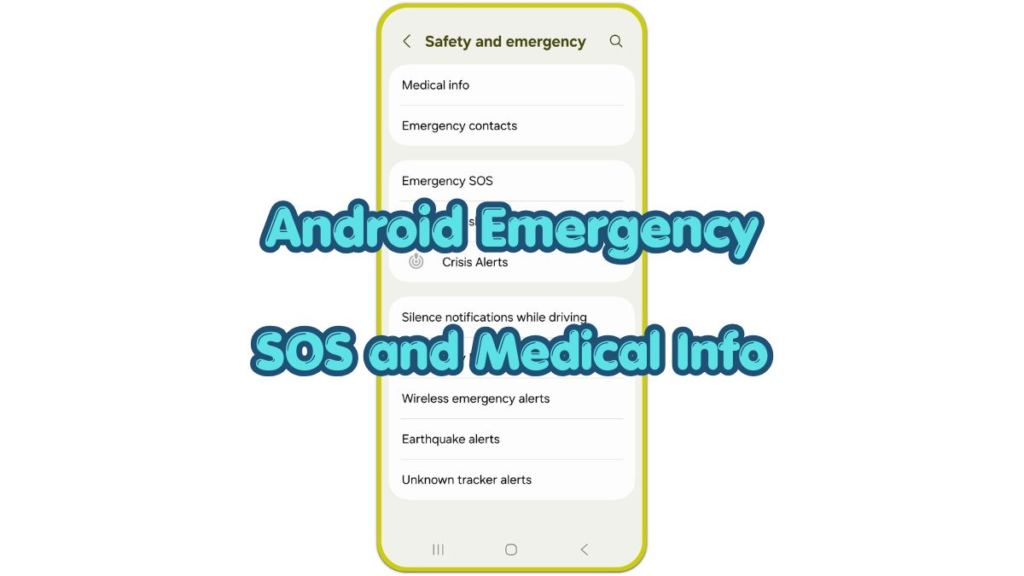
Introduction
Android Emergency SOS and Medical Info help someone call for help or view key health details from your phone during a serious situation. These options stay inside the system settings, so many users miss them until they need them.
The setup matters when SOS is off, trusted contacts are missing, or health details stay hidden from the locked screen. During an urgent moment, the safety panel should show the right information without opening the full phone.
Menu names differ by Android version and phone brand. Samsung Galaxy, Google Pixel, Motorola, OnePlus, and other Android phones use different paths, but the same setup usually sits near Safety and emergency, SOS, Medical info, or Emergency contacts.
Step-by-Step Guide: Android Emergency SOS and Medical Info
Step 1: Open Safety and Emergency Settings
Open Settings on your Android phone and choose Safety and emergency.
If that label does not appear, use the Settings search bar and type emergency, SOS, medical info, or emergency contacts. Search usually finds the correct menu faster than checking every category by hand.
On Samsung Galaxy phones, also check Advanced features, then SOS. For Google Pixel phones, open Safety, then Emergency SOS. On other Android phones, use Emergency information or a similar label.
Open the matching system menu before changing contacts or health details. Starting there keeps the setup tied to the lock screen and the phone’s safety panel.
Step 2: Set Up the SOS Shortcut
Open Emergency SOS from the safety menu. Review the button shortcut listed on your phone. Many Android phones start SOS after repeated presses of the power button or side key.
Turn on the feature only after you understand what the shortcut does. Check whether it calls emergency services, shares location, sends alerts to contacts, or starts another safety action.
Keep the setup simple. Choose only the actions you would want during a real urgent situation. Too many automatic options create confusion, especially when you press the side button by mistake.
After changing the setting, return to the SOS screen and read the shortcut listed there. The exact button sequence matters more than the menu name.
Step 3: Add Medical Details and Trusted Contacts
Return to Safety and emergency, then open Medical info or Emergency information.
Add only details that help during an urgent situation. Useful fields include your name, blood type, allergies, medications, medical conditions, and short notes. Keep each entry clear and direct.
Next, open Emergency contacts and add people who should receive or handle an alert. Choose someone who answers quickly and understands what to do after receiving the message.
After saving the details, check the option for lock screen access. Some phones show a setting such as Show on lock screen, Show when locked, or Allow access without unlocking. Turn it on when you want health details or trusted contacts to appear from the safety panel.
Troubleshooting
Troubleshooting 1: SOS Starts Too Easily
Open the SOS setting again and review the shortcut. Some phones let you change the countdown, warning sound, or button press behavior. Use a setup that still works quickly but does not start by accident in a pocket, bag, or car mount.
Troubleshooting 2: Details Do Not Show on the Lock Screen
Go back to Medical info or Emergency information and check the display option for the locked screen. Adding the details is not always enough. You also need to allow access before the phone shows saved information without unlocking.
Troubleshooting 3: Saved Contacts Do Not Appear
Check whether the person still exists in the main Contacts app. Update the phone number, remove duplicate entries, then add the person again from the safety menu. Reopen the locked-screen panel after the change.
Additional Tips
Review trusted contacts after changing phones, phone numbers, or Google accounts. A contact from an old device does not always appear correctly after a transfer.
Keep medical notes short. First responders need quick facts, not a long personal history. Allergies, medications, major conditions, and one clear note usually matter most.
Check the feature again after a major Android update. Safety menus often stay in the same area, but a new version or manufacturer update sometimes changes the exact label.
Final Notes
Android Emergency SOS and Medical Info work best with a simple setup. Start with the safety menu, confirm the SOS shortcut, then add health details and trusted contacts.
The lock screen check is the final part. If the saved information does not appear there, return to the safety menu and turn on locked-screen access.
A short setup helps the phone show the right details during a real emergency. Keep the entries current and test the safety panel without placing a real emergency call.
Checklist
- Open Safety and emergency from Android Settings.
- Turn on Emergency SOS and confirm the button shortcut.
- Add trusted contacts from the safety menu.
- Enter short medical details such as allergies, medications, and conditions.
- Allow lock screen access for saved information.
- Check the safety panel without placing a real emergency call.