
Introduction
A new Android phone feels harder than it should when too many settings stay untouched. The screen wakes too often, notifications keep interrupting you, and apps ask for permissions you do not understand.
The phone also feels messy when you have to look through different menus for the settings you need. This android basic settings guide starts with the settings that make the phone easier to read, easier to control, and safer to use every day.
This guide keeps the first setup focused on daily use before you start changing deeper features.
Step-by-Step Guide
Step 1: Open Settings and Learn the Main Layout
Unlock the phone and open Settings. You can find it from the home screen, app drawer, or the small gear icon in the quick panel.
Use the main Settings screen first so you can see where Android groups the basic phone controls.
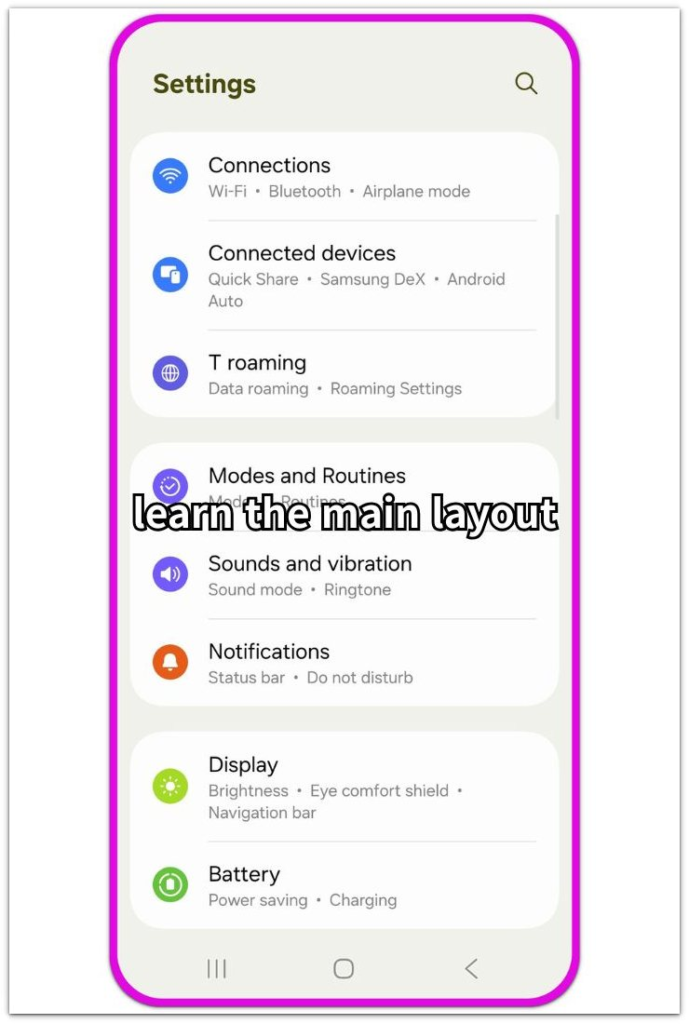
Scroll through that screen and notice where the common sections are. Most Android phones group Wi-Fi, display, sound, apps, security, and system updates in different areas.
Once the layout feels familiar, the rest of the setup becomes much easier to follow.
Step 2: Connect Only to Trusted Wi-Fi
Open Network & internet, Connections, or Wi-Fi, depending on the phone. Choose a Wi-Fi network you trust and enter the password.
Start with Wi-Fi and connection settings before changing deeper network options.

Avoid public networks with strange names or no clear owner. After connecting, tap the network details and check the Auto-connect setting.
For home Wi-Fi, Auto-connect is usually helpful. For public Wi-Fi, turn it off so the phone does not keep joining that network later.
Step 3: Make the Screen Easier to Read
Open Display settings. Turn on Adaptive Brightness if the screen often feels too bright or too dim. Display settings are where brightness, reading comfort, and screen behavior start.
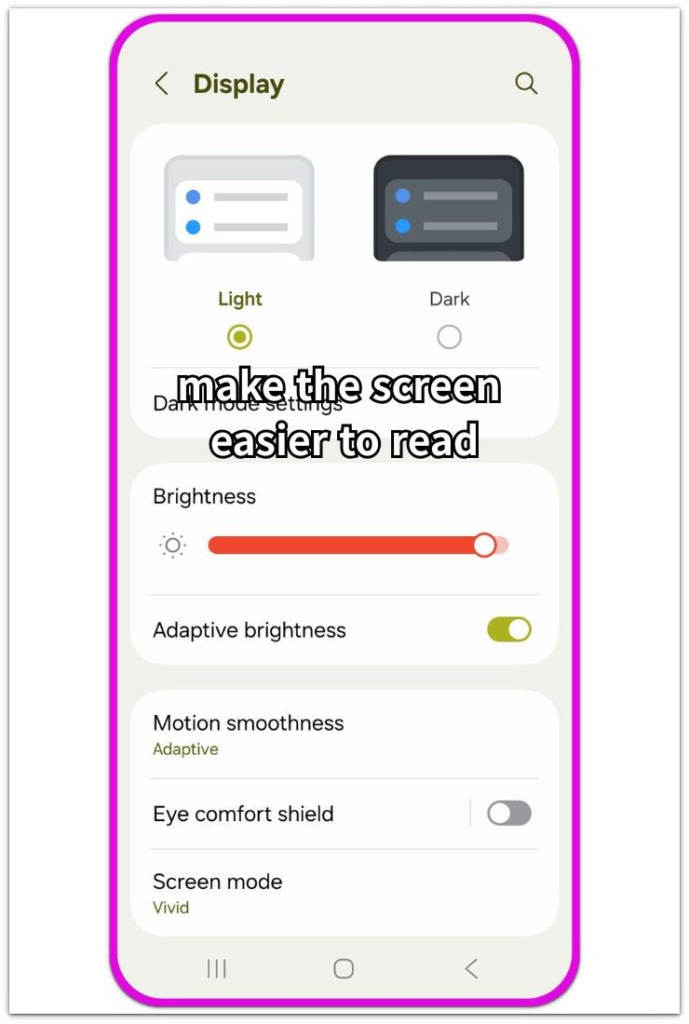
Set Screen Timeout to a practical time, such as 30 seconds or 1 minute. If menus or messages feel hard to read, increase Font size or Display size slightly. Start with one small change first. Use a size that feels comfortable without cutting off buttons or menus.
Step 4: Control Sounds and Notifications
Open Sound and vibration first. Set ringtone, media, alarm, and notification volume separately.
A phone feels messy when every alert is too loud or too quiet. Open Notifications next and review the apps sending alerts.
Use the Notifications screen to keep useful alerts on and reduce the ones that interrupt you.
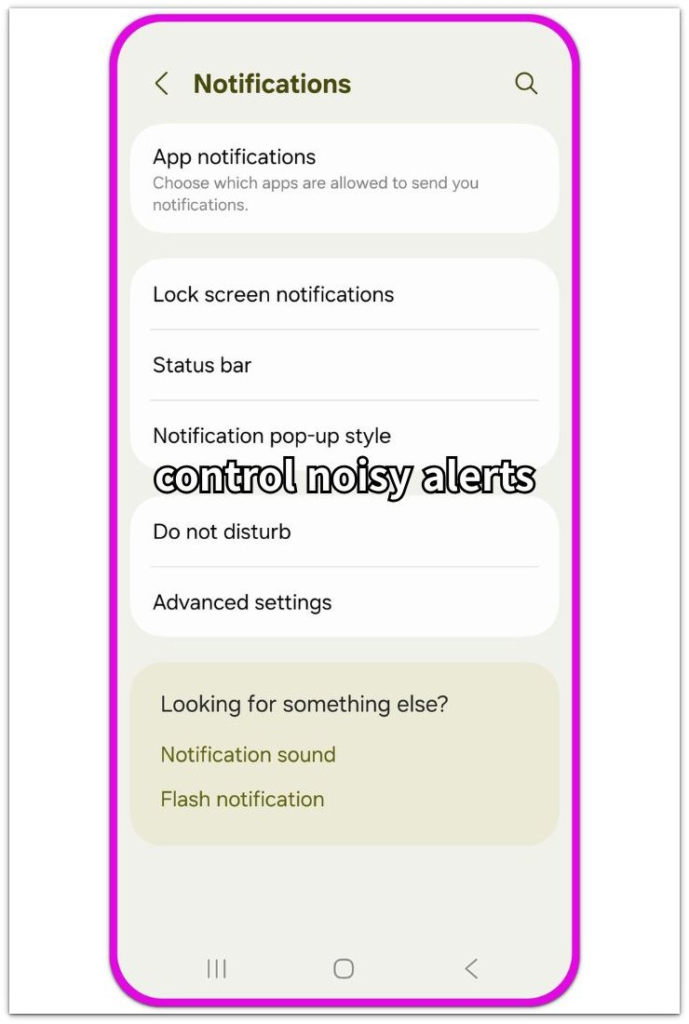
Keep calls, messages, banking, delivery, and important apps active. Turn off noisy alerts from apps you do not need every day.
Step 5: Check Lock Screen and Security
Open Security, Lock screen, or Biometrics, depending on the phone. Set a PIN, password, fingerprint, or face unlock before you store important accounts on the device.
Set a real lock method first before you add important accounts to the phone.
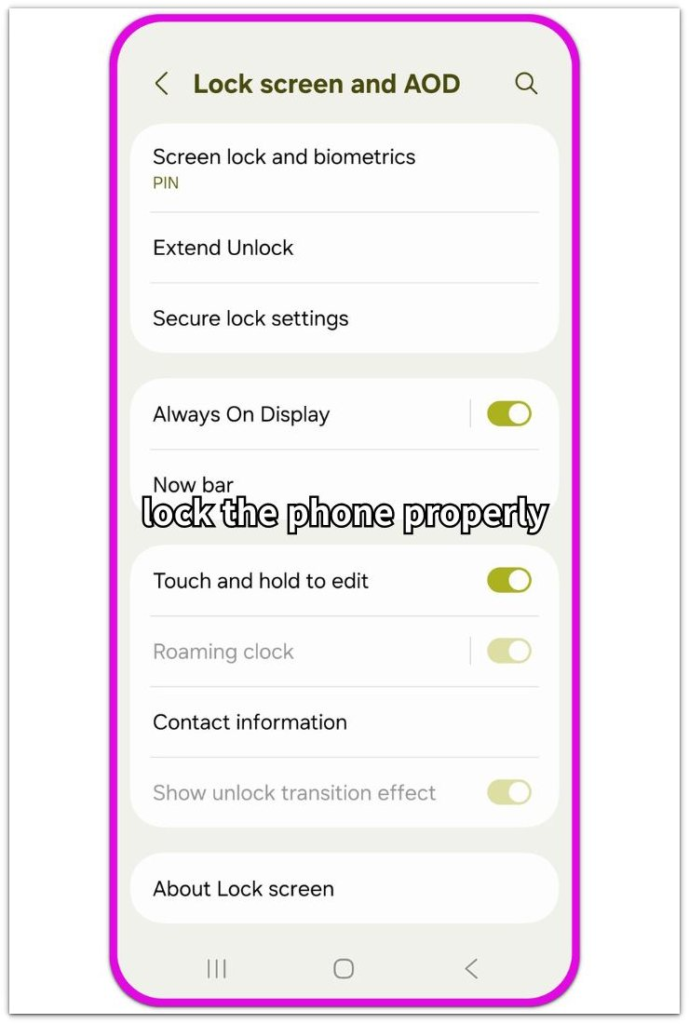
A simple swipe lock is not enough for daily use. Check whether sensitive notification content appears on the lock screen.
Hide private message previews if other people see your phone often. Turn on Find My Device so you have a way to locate the phone if you lose it.
Troubleshooting
Troubleshooting 1: The settings menu does not look the same
Android settings menus do not always use the same names on every phone. One phone shows Network & internet, while another shows Connections.
Security also appears under Lock screen, Biometrics, or a similar menu. Keep going even when the wording looks different.
Look for the setting group that matches the job you are trying to do. For an android basic settings guide, the exact menu name matters less than finding Wi-Fi, display, sound, notifications, and security in the right area.
Troubleshooting 2: Notifications still feel too noisy
The phone still feels annoying even after the volume is lower. That usually happens when too many apps still send alerts.
Open Notifications again and check the apps that interrupted you today. Keep alerts from calls, messages, banking, delivery, and important accounts.
Turn off the apps that only send ads, reminders, or random updates. The phone should feel calmer without hiding the alerts you actually need.
Troubleshooting 3: The phone feels wrong after changing settings
A beginner setup feels strange for a short time after several settings change at once. The screen dims sooner than you expected, notifications might look different from before, and the lock screen asks for a PIN or fingerprint more often.
Avoid undoing everything at the same time. Change one setting back, test the phone for a few minutes, and then check the next one.
That makes it easier to find the setting that caused the problem.
Extra Section 1: Use Settings Search When Menu Names Look Different
The Settings search bar is the easiest shortcut when a menu name does not match what you expected. Open Settings and tap the search bar at the top.
Type one simple word, such as Wi-Fi, notifications, permissions, display, or lock screen. Use a short word instead of a long question.
A short word usually brings up the exact setting faster than scrolling through every menu. The Settings search bar helps most when the same feature appears under a different menu name on another Android phone.
Use it whenever you know what you want to change but have not found the right section.
Extra Section 2: Adjust the Setup After a Few Days of Real Use
A beginner setup does not have to be perfect on the first day. Use the phone normally for a few days before changing more settings.
Notice what still bothers you during real use. The screen might turn off before you finish reading, and one app might keep sending alerts you do not need.
Text size also feels fine indoors but becomes harder to read outside. Change only one thing at a time, then use the phone again.
That keeps the setup simple and helps you see which change actually made the phone easier to use.
Additional Tips
Keep the home screen simple at first. Place Phone, Messages, Camera, Settings, and the apps you use every day where your thumb naturally reaches.
Move rarely used apps into folders instead of leaving every icon on the first screen. Keep useful notifications on instead of turning off every alert just to make the phone quiet.
Calls, messages, banking, delivery, and account security alerts should stay easy to notice. For a beginner setup, the goal is not to remove every alert.
Keep the alerts that matter, and silence the ones that only interrupt you.
Final Notes
A beginner Android setup does not need to be complicated. Start with the settings that affect daily use first: Wi-Fi, screen readability, sound, notifications, and lock screen security.
Those settings decide whether the phone feels easy or annoying during normal use. Once they are in place, leave the deeper menus alone until you know what you want to change.
When the phone is easy to read, stays quiet at the right times, and uses a proper lock, the basic setup is already in good shape.
Checklist
- Open Settings and learn where the main sections are.
- Connect only to a trusted Wi-Fi network.
- Turn off auto-connect for public Wi-Fi.
- Set brightness and screen timeout for comfortable daily use.
- Increase font or display size only if menus are hard to read.
- Set ringtone, media, alarm, and notification volume separately.
- Keep important notifications on and silence alerts you do not need.
- Set a PIN, password, fingerprint, or face unlock.
- Hide sensitive message previews on the lock screen.
- Turn on Find My Device before you lose the phone.